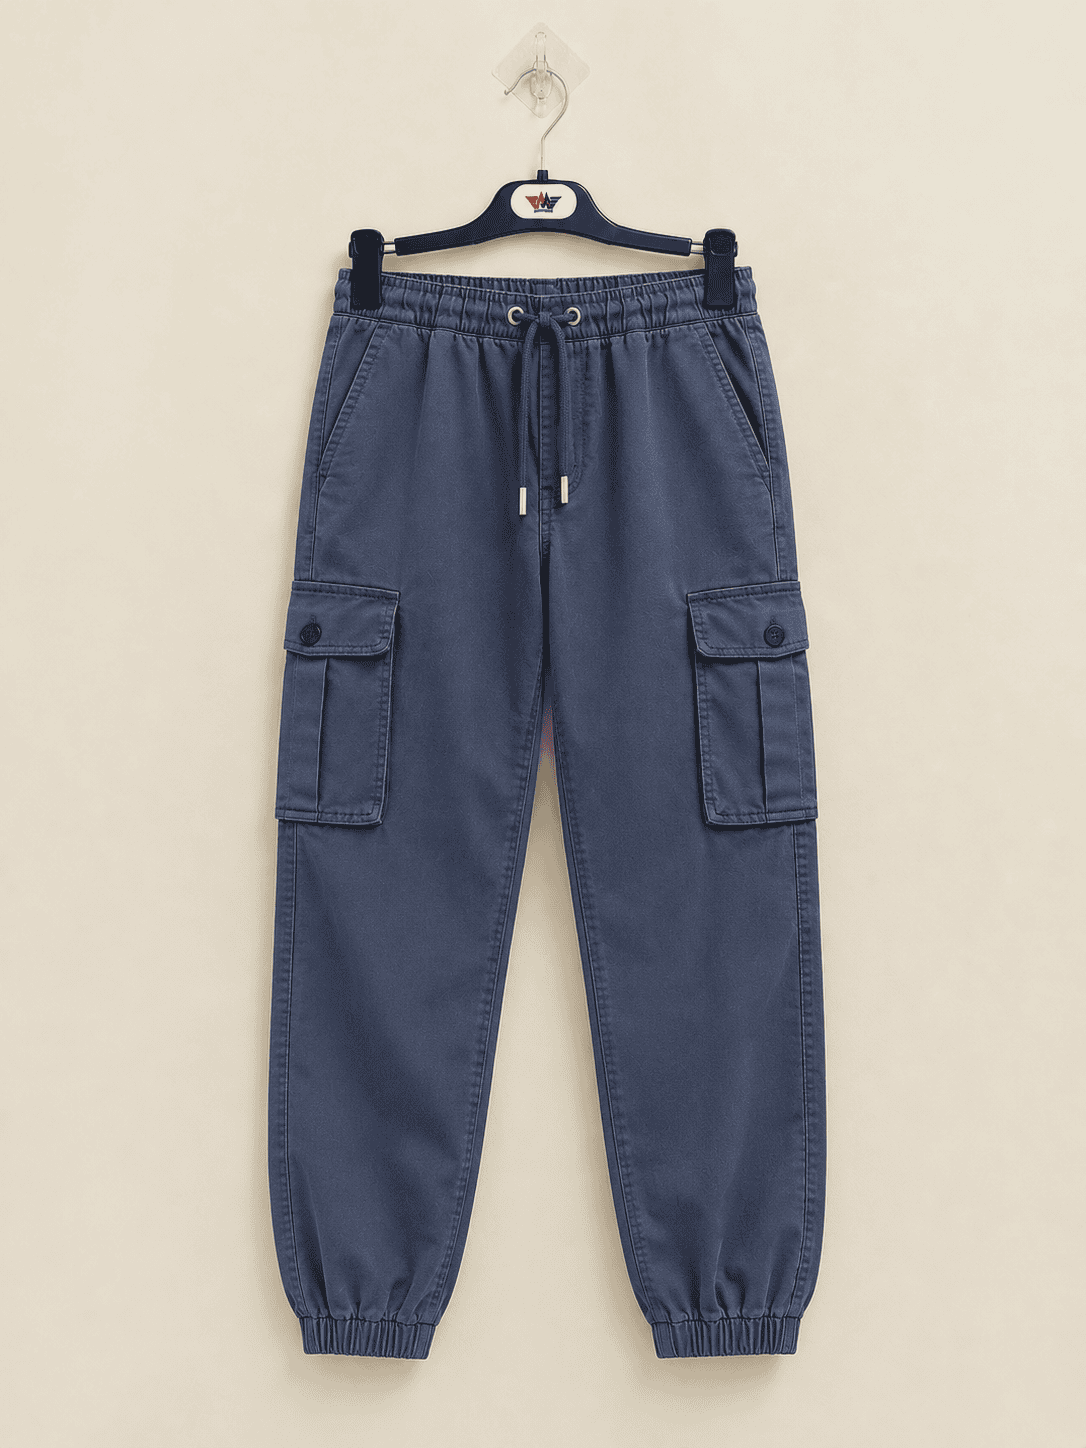
Cargo pants pocket design affects how a trouser looks, what it carries and whether the wearer can use it comfortably. This guide helps apparel brands and uniform buyers specify pocket construction, compare prototypes and agree what a finished pocket must do before placing a bulk order.
Start with what the pocket must carry
The first decision in cargo pants pocket design is what the wearer needs to carry and how often they need to reach it. A streetwear customer might keep a phone in one thigh pocket and leave the other empty. A uniform wearer may need a pocket that takes a small notebook while seated. In both cases, a reference photo can help communicate the silhouette, but it leaves unanswered questions about the opening, internal depth, closure and position on the leg.
Build a brief around the actual use case. Identify the main item, its dimensions with its case or cover, its approximate loaded weight and the orientation in which the wearer will insert it. Say whether access should work with one hand, whether the pocket must close with the item inside and whether the garment will be worn over a base layer. A phone can fit in an empty pocket on a table and still be awkward to remove when the wearer is seated and the fabric is under tension.
Decide which job each pocket performs. A side-entry hand pocket can handle frequent access to small items. A thigh pocket can hold bulkier objects or give the garment its visual identity. A rear pocket may sit under the wearer when seated, which makes it a poor default location for a hard object on a driving uniform. A hidden pocket is worth considering only when the brief specifies what it should protect and how the wearer will find the opening.
The design team can usually settle the order of priorities in one sentence. For example, a commuter trouser might prioritize phone access while seated, a clean leg when empty and a closure the wearer can operate discreetly. That hierarchy helps resolve trade-offs when a deeper gusset increases capacity but changes the silhouette. Browse the Cargo & Trouser product range and the Workwear collection to put those use cases in context before briefing your supplier.
Compare flat, pleated and gusseted pockets
A flat patch pocket uses a face panel stitched to the leg. It keeps the outline close to the body when empty and can suit slim or straight fashion trousers. Its effective capacity is limited by the give in the pocket face and leg panel. A tightly fitted thigh may leave little space for a rigid object even when the object looks smaller than the pocket on a drawing. Test the filled pocket on a person before making the face larger to compensate.
A pleated patch pocket gives the face room to expand through a fold. A center pleat can emphasize the utility look and expand near the middle. Side pleats can concentrate expansion near the edges and leave a cleaner center face for a label. Ask the supplier to show how the fold is held at the opening and base. The restraint points affect whether the pocket sits flat and whether a loaded object pulls on the mouth. A pleat pressed sharply on a new sample can behave differently after laundering, so compare it again after the agreed care cycle.
A gusset is a separate piece that adds depth along selected edges. A side-only gusset can keep the base relatively close to the leg. A gusset that runs around the sides and base gives more usable volume but adds layers where it joins the face and leg. Rounded corners can soften the look, while tight corners make it harder to maintain even stitching. Request a finished gusset depth at the relevant measurement point and say whether it is checked collapsed or extended.
A welt or inset pocket is another option when a visible patch would interrupt a cleaner trouser silhouette. It introduces an opening in the leg panel and a pocket bag inside. Bag movement, show-through and the reinforcement around the opening deserve review, particularly on lightweight fabric. An inset pocket and a cargo patch can coexist, provided the two bags or attachments do not compete for the same space.
Choose between these structures with a paired prototype. Keep the leg block, fabric and opening width consistent, then change only the pocket construction. Compare the same object while standing and sitting and photograph the empty silhouette from the side. The comparison helps the team judge whether the extra depth justifies the extra bulk and sewing work.
| Construction | Useful for | Bulk approval check |
|---|---|---|
| Flat patch | Clean outline and limited storage | Check clearance with the object inside on a fitted leg. |
| Pleated patch | Expandable storage with a folded face | Check that the pleat returns to shape after use and washing. |
| Side gusset | Extra depth with a relatively flat base | Check where the gusset ends and how the corners are stitched. |
| Side and base gusset | Greater volume for bulky contents | Check swing, flap coverage and layer thickness. |
| Inset pocket | A discreet opening with an internal bag | Check show-through and whether the loaded bag pulls on the shell. |
Set the opening, usable depth and placement
Specify the clear opening as the distance a hand or object can actually pass through. A nominal width measured across the top edge may include folded fabric, bar tacks, zipper stops or a snap tab that takes up part of the entrance. In the tech pack, state whether the pocket is laid flat, whether the closure is open, and where the tape starts and ends. On a slanted opening, indicate whether the width is measured along the opening or horizontally across it.
Usable depth is the internal distance available after folds, seams and closure clearance are accounted for. If a phone reaches the base but protrudes into the flap or prevents a snap from engaging, the pocket falls short of its purpose. Check the sample with the actual object, including a protective case if one is common in the target market. Ask the wearer to retrieve it several times. Fingers need room around an object, especially when it sits flush with the pocket face.
Use garment landmarks to place the pocket. An illustrated spec can locate the upper corner below the waistband seam and forward of the side seam. Define whether the waistband measurement begins at the top edge or the joining seam. A second point, such as the position of the lower corner relative to the side seam, helps control rotation. A single vertical measurement can allow the face to tilt while still passing inspection. For asymmetric styles, supply a separate drawing for each leg as viewed on the wearer.
Place the test object in the pocket before judging the height. A low pocket on a long trouser may swing during walking, while a high pocket can compete with a hand pocket or contact the hip when the wearer climbs a step. Put the garment on a fit model, have them sit and ask them to reach the opening without twisting the trouser leg. Repeat the check with a belt or typical layer if it changes the waist position.
Record a measurement tolerance for each important point after reviewing sewing capability and visual sensitivity. Left and right pockets can each land inside their individual tolerance yet look visibly uneven next to each other. Where symmetry matters, add a paired check on the finished garment. Photograph the approved front and side positions so the measurement table and visual standard support the same result.
| Point | Measurement instruction |
|---|---|
| Clear opening | With the closure open, measure between the usable endpoints marked on the drawing. |
| Usable depth | Measure internally from the specified opening line to the deepest usable point without stretching the pocket. |
| Placement | Measure the upper and lower reference points from the garment landmarks shown in the tech pack. |
| Flap overlap | Measure at the marked point with the pocket empty and the flap closed, then check coverage when loaded. |
Choose flaps and closures for real use
A plain flap can deliver the familiar cargo look and cover the opening without hardware. Set its finished width, depth, corner shape and overlap with the opening. A flap that looks proportional on an empty pocket may curl upward over a loaded gusset. Check coverage with the agreed object inside, then check that the flap sits naturally again after the object is removed. Topstitch spacing and edge thickness become especially visible on a contrasting flap or pale colorway.
Snaps can give a clear open-and-closed feel and are often selected for one-handed access. Confirm the location on the flap and pocket face and ask how the attaching area will be supported. Closing the snap should not pull the pocket mouth sideways or visibly distort the face. Review operation on a worn sample. The movement needed to release hardware can put different strain on fabric when the garment is worn than when the operator opens it on a worktable.
Hook-and-loop tape offers a broad contact area and can accommodate some variation in how a flap lands. Consider lint pickup, potential contact with adjacent fabric, opening noise and the feel of any exposed corners. Decide whether the tape is visible when the flap is open. Ask to see the tape and stitching in the intended color, especially if a matching tape is unavailable and the supplier proposes a substitute. Fastener length and stitching layout should be clear in the trim specification.
A zipper can hold small contents inside a pocket with a relatively narrow opening, but zipper tape and stops reduce usable clearance. Assess puller access when the wearer is seated and check for snagging near the lining or facing. Match the puller style to the brief and decide whether the slider should remain visible or tuck under a cover. Inspect closed samples for waviness. A zipper tape and a washed shell fabric can respond differently during finishing, which may change the look around the opening.
Buttons and concealed fasteners suit some fashion concepts and should be assessed at the intended pace of use. A closure that takes two hands may work on a decorative pocket, while a frequently accessed uniform pocket may require a faster option. Use the same operating sequence across the shortlisted prototypes and record which operation causes strain or takes extra movement. That gives the buyer a reason for choosing one closure beyond preference for its appearance.
Match pocket construction to shell fabric
Start by reviewing the garment fabric where the pocket will be attached. A compact cotton twill can give a patch pocket a clear edge and a structured appearance. A lightweight woven can reveal the outline of a heavy pocket bag or show puckering around dense stitching. A stretch woven may feel comfortable through the thigh while losing some of that freedom if the pocket face and its attachments restrict a large area of the leg. The behavior of the complete construction is what the wearer experiences.
Request a fabric and trim combination that can be reviewed as a sewn sample. If the pocket face is cut from the same fabric as the shell, specify grain direction where it affects appearance or stretch. With a ripstop grid, directional twill or printed material, show whether pocket orientation should follow the main panel. Pocket faces may need extra care when nesting pieces for cutting because a rotation that saves fabric can change the direction of a visible line.
Pocketing for a hand pocket or an inset bag needs its own spec. Review opacity against the shell, how the bag feels against skin or base layers and whether the internal edge is comfortably finished. On light colors, check show-through under ordinary daylight as well as indoor lighting. If the bag must be secured at a seam or waistband, show the attachment point and assess whether it pulls the trouser when loaded. A loose bag can shift during wear, while an attachment in the wrong place can create a visible drag line.
Washing and finishing can affect multiple components at once. Check the shell, pocket face, facing, pocketing and trim together using the intended care instructions. Look for changes in flap shape, pocket edge appearance, usable clearance and shade. Keep the test conditions with the photos so that later comparisons use the same setup. The garment shrinkage test guide provides a related starting point for planning measurements before and after laundering.
If the supplier proposes a fabric substitution, compare the finished pocket assembly as well as swatches. Two materials with similar weight can differ in stiffness, stretch, recovery or appearance at a folded edge. Approve substitutions with a documented sample where the change affects pocket function or the visual standard. A written description and a swatch are valuable records, but the sewn and washed garment shows how all the layers work together.
Design reinforcement and stitching around stress points
Identify the locations that see force during ordinary wear. Common examples are the ends of a hand-pocket opening, the upper corners of a cargo patch and the areas where the wearer pulls a flap or releases a fastener. The best place to support an opening depends on the direction of the load and how the pocket is assembled. Ask the supplier to explain which layers take the load and where the proposed reinforcement transfers it into the trouser panel.
A bar tack can secure the end of an opening or strengthen an attachment point when the material and construction can support it. Confirm the bar tack position, orientation, thread appearance and the acceptable visual standard on a sample. Dense stitching can leave marks or cause damage on some lightweight materials, so review the actual cloth and sewing setup before specifying a more prominent tack. If the shell needs internal support under hardware, make that component visible in the construction drawing.
Topstitching also controls appearance. A pocket can look twisted because its topstitching drifts around corners or because the face was fed unevenly onto the leg. Define the line or lines of stitching, measure their position from the edge and show how they end. If the style uses contrast thread, review curves, starts and stops under lighting that makes the thread easy to see. If it uses matching thread, inspect for puckering and uneven edge distance from the normal viewing distance.
On pleated and gusseted pockets, check layer transitions. A machine may handle the straight edges consistently and hesitate where a flap, facing or fold creates a thicker stack. Examine these transitions for skipped stitches, uneven stitch length or raised corners. Test the approved construction in production materials and ask for a sample sewn through the same layer stack the operator will handle in bulk. A clean mock-up made from easier cloth provides limited information about sewing difficulty.
Agree how the quality team will examine the reinforcement. A visual inspection can confirm position and workmanship. An agreed functional check with a representative item can reveal distortion and loss of access. Where the buyer requires a formal strength test, record the applicable method, load or acceptance criteria in the order documents and agree how samples will be selected. Everyday fit checks and formal tests answer different questions and can both belong in the plan.
Grade pockets across the size range
Pocket grading starts with a choice about which dimensions need to change. A phone does not get smaller when the wearer buys a smaller trouser, so a pocket designed for that object may need a consistent minimum opening and depth. A purely decorative patch may scale more freely with the leg. Placement can change by size even when the pocket piece stays constant. Write these decisions separately so that a grader can preserve both function and visual proportion.
On the smallest size, review the distance from the pocket face to the side seam, the gap between the flap and the hand pocket, and the way the wearer reaches the opening. The pocket might occupy enough of the thigh to stiffen it or alter the intended shape. If this happens, consider a different position, flap shape or distribution of capacity. Simply shrinking the pattern piece can defeat the original function.
On the largest size, review whether the same placement rule leaves the opening too far to the side or the pocket looking undersized. Compare the leg in a front view, a side view and while seated. The pocket can appear balanced in a technical flat while feeling too far back on the body. If the style has multiple inseam lengths, check whether the pocket position should follow a waist reference, a knee reference or different rules for each length.
Where a broad range requires more than one pocket size, record the size groups and preserve the same functional acceptance criteria where applicable. A shared hardware size may simplify sourcing, but verify that it fits the flap across all groups. If a flap or face changes size, check logo artwork and label position again. A fixed graphic width may look different once the panel width changes.
Review a base size and representative sizes near the extremes before approval. For each size, keep a photo with the placement marked and record the same object test. Compare the resulting garments with the measurement table so you can distinguish a pattern problem from a sewing placement problem. If the team revises a grade rule, update all affected size columns together. A mixed revision can cause the cutting room and the inspection team to work from different expectations.
Build the pocket specification and compare quotes
A useful tech pack shows the assembled pocket and the pieces the factory needs to make it. Provide front and side drawings, an open view of the closure, and a detail of folds, gussets and reinforcements. Label left and right from the wearer’s perspective. Show which features must match across legs and which are intentionally different. Where an annotated photo accompanies a drawing, identify which source governs if the two disagree. The apparel tech pack guide covers how to organize these instructions in the wider garment file.
Create a measurement table with clear descriptions for opening width, usable depth, pocket placement, finished face size and flap overlap. Include the base size, any grading rules and agreed tolerances. Add a photo or diagram to explain measurements that might otherwise be taken with the pocket stretched, closed or partially open. Define acceptable conditions for filled and empty views. These instructions make sample comments easier to reproduce and give the quality team a consistent reference.
Use the bill of materials to identify pocketing, hardware, thread and any reinforcement material. Include finish and color where they matter. If the supplier uses a proprietary trim reference, ask for the identifying code and approve a physical or clearly documented sample. Record whether the trim is supplied by the buyer or included by the manufacturer. This makes it easier to see when two quotations describe different inputs.
Pocket cost can change with the number of cut components, handling steps, sewing passes and trims. Two pockets with similar face dimensions can use different amounts of cloth if one includes a continuous gusset and a wide flap. Contrast topstitching or print matching can add handling requirements. Ask suppliers to price the same drawing, fabric and trim list and clarify whether their quotes include sampling, specific washes or buyer-requested testing. The wholesale quote comparison guide explains the broader inputs to compare.
To control costs, ask what can be changed without losing the pocket’s main function. For instance, a narrower flap may save little if the change adds a trim or assembly step. One shared pocket construction across two colorways may simplify production if both fabrics behave similarly. Evaluate alternatives against the approved use case and request a revised drawing and quote for any accepted change. Small substitutions are easier to manage when the documents specify which revision the purchase order references.
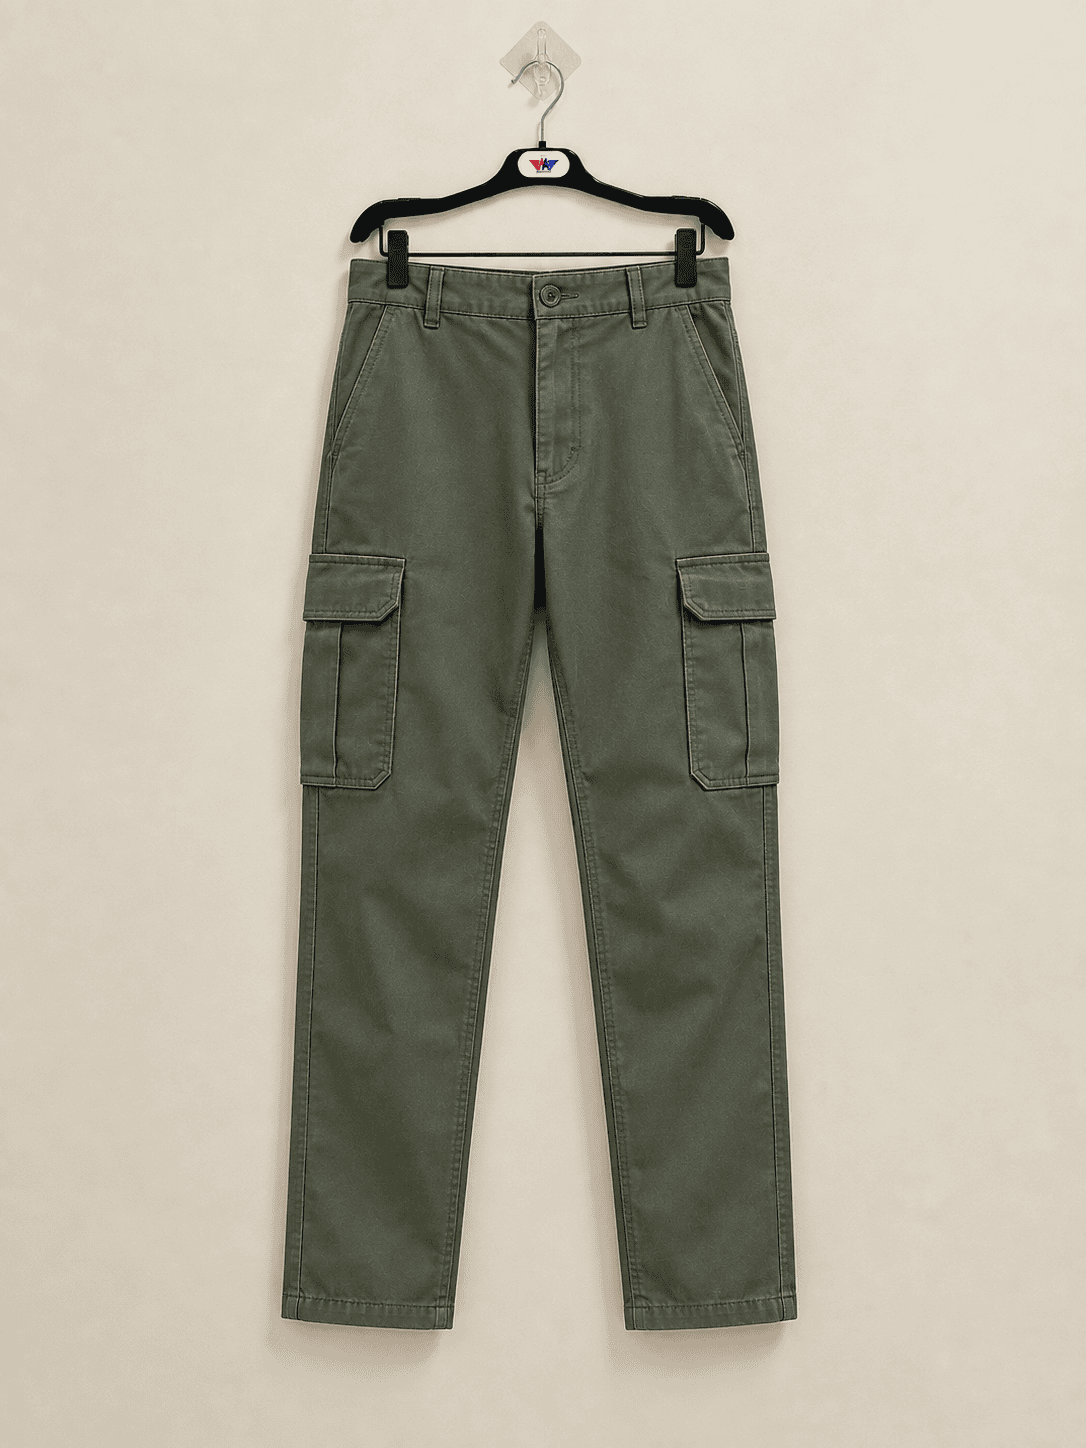
Test a loaded sample before bulk approval
Begin with an empty garment. Compare the pocket pair from the front and side, open every closure and measure the specified points using the approved method. Note puckering, unexpected folds, exposed pocket bags or a flap that sits away from the leg. Record the sample size and material details. A photo with the sample reference can be more useful to the factory than a verbal description such as “pocket looks low.”
Next, insert the representative object and close the pocket where the design includes a closure. Walk, climb a step, sit and reach the opening in the positions relevant to the garment. Observe whether the object shifts, the pocket presses into the body or the wearer has to move the leg fabric to reach it. Remove the object and check whether the pocket returns to its intended empty shape. For uniform programs, run the practical review with any required belt or typical base layer when it changes the result.
Operate the closure repeatedly under the test conditions agreed for sample review. Document any separation, fraying, skipped engagement or deformation near the attachment. If you change a snap position, consider how that affects overlap and the loaded pocket rather than reviewing the revised hardware in isolation. For a zipper, observe whether the puller can still be grasped when the thigh fabric is under tension. In both cases, record the issue where it occurs and request a marked correction.
Review a washed garment against the unwashed reference and repeat the loaded checks where the construction changes. A flap that curls or a bag that twists can affect access even if the overall trouser measurements stay within tolerance. Compare the same measurements, sample size and orientation. Share photos and test notes alongside the revised tech pack, and use the garment sampling guide to decide where the updated sample fits in your approval sequence.
At pre-production approval, compare the proposed bulk fabric, thread and trim to the approved sample. During production, ask for checks early enough to catch recurring placement or stitching issues before they spread through an order. Final inspection can then use the agreed measurements, workmanship references and functional criteria. A production team can inspect the opening and hardware quickly when the test method and acceptable outcome are clear. Keep a record of approved deviations, if any, so the buyer and factory use the same standard.
Apply the decisions to three cargo styles
Consider a slim streetwear cargo. The brief calls for a clean outline and occasional phone storage. Start with a flat or shallow pleated pocket, make room for the phone with its case and review the thigh fit when seated. The main comparison is between the empty silhouette and access with the pocket loaded. If an opening appears wide enough on paper but the wearer cannot grip the phone, revisit the entrance or the placement before adding depth.
For a relaxed utility cargo, the brief might prioritize storage for a phone and a small notebook in separate pockets. Prototype a side-gusseted or full-gusset construction and assign each object to a specific compartment. Test whether the filled pocket swings when walking and whether the flap stays closed when the wearer sits. If the user needs fast access to the phone but rarely retrieves the notebook, the two pockets can use different closures. Draw that distinction explicitly and have the sample room label the intended side.
For a driving or seated uniform, use the actual seated posture to choose the pocket angle and height. A closure that is easy to operate while standing can become harder to reach when the thigh bends and the fabric pulls across the knee. Check whether the object contacts the wearer or the seat edge. Move the pocket on a test garment before committing to a new leg pattern. The aim is to separate a placement issue from an issue with the pocket volume or the trouser fit.
These examples can share a starting leg block and still need different pocket assemblies. A product manager can use one approval worksheet across them by changing the intended object, the required body positions and the pass criteria for the pocket. Keep the core measurements comparable when testing two options for the same style. The custom cargo pants sourcing guide covers the wider order decisions, including the garment itself, when pocket development is only one part of a new range.
When your team is ready to discuss a program, gather the intended use, quantities by style or color, fabric direction, available drawings and the test object dimensions. Include the size range and tell the supplier which decisions are still open. Share the brief through the M&A Composite contact page. A supplier can give more specific feedback when the drawing explains how the pocket must work and what the wearer will carry.
Frequently asked questions
What is the difference between a pleated and a gusseted cargo pocket?
A pleated pocket expands through folds in the face panel. A gusseted pocket uses a separate piece to add depth along one or more edges. Compare both constructions on a worn sample with the same object inside.
How do you measure a cargo pocket opening?
Measure the clear distance the object can pass through, with the closure open and the pocket in the condition specified in the tech pack. Mark the endpoints and account for zipper stops, stitching and other obstructions.
Should cargo pockets get larger as trouser sizes increase?
Grade the pocket only where its appearance or function calls for it. An opening designed for a specific phone may need a consistent minimum width across sizes even when the placement changes.
How can buyers check whether a cargo pocket works while seated?
Have the fit model sit in a typical position with the intended item in the pocket. Ask them to reach, open, remove and replace the item, then check whether the closure engages comfortably.
What should a cargo pocket tech pack include?
Include open and closed views, finished dimensions, placement landmarks, grading rules, tolerances, construction details, hardware and materials. Add the intended contents and the functional acceptance criteria for sample review.
When should cargo pockets be checked after washing?
Review the pocket after the agreed care cycle before bulk approval. Compare usable dimensions, closure operation, flap shape and the pocket’s appearance against the approved reference.