Develop boxer briefs multipacks by approving both the fit of each pair and the finished retail assortment. This guide covers materials, size grading, pack formats, component stock and inspection before ordering.
Decide what every pack must deliver
A boxer briefs multipack makes two promises. The first is that the underwear fits the customer as described. The second is that the customer receives the right number, colors and sizes of pairs. Product teams can approve the first promise on a single sample, but the second requires a fully assembled pack. Set both approval points before asking suppliers to quote. The factory needs to know whether it is supplying loose garments, assembled retail packs or retail packs grouped into specific cartons.
Start with the purchase occasion. A three-pack of neutral colors can serve a customer replacing worn basics. A set containing a print can serve a shopper who wants variety but expects the same fit from the printed pair. A larger value pack may suit customers replenishing several pairs at once, although it demands more units of each component and uses more package space. The right pack count depends on the channel, the price point and the product the shopper expects to find inside.
Write a one-page brief with the target customer, intended selling channel, size range, colors and pack count. Attach a reference garment if available and note its size and wash history. Identify the fit features that matter across the set, such as inseam length, pouch shape and waistband feel. Share the intended retail presentation, including whether shoppers will be able to see one pair through a window. This helps the supplier understand why the order of the colors matters.
Related resource: Boxer product collection.
Create a bill of materials for the assortment
Give the complete pack its own stock code and give each component a separate reference for fabric, color and size. A pack labeled black, navy and gray should correspond to one black pair, one navy pair and one gray pair. If alternatives are allowed, write them into the assortment rules and ensure the listing or package describes the way the set is sold. A pack photographed with three specific colors needs a different assortment rule from a pack advertised as assorted.
The component references are useful even when the individual pairs will never be sold separately. If the factory finds a shortfall in size medium navy, the planning team can locate the affected pack immediately and calculate the number of complete units that can ship. For a pack with two black pairs and one gray pair, remember to divide the black component stock by two before comparing it with the gray quantity.
Show the intended layout and folding sequence. Black and deep navy may be difficult to distinguish under factory lighting. A labeled shade card and a reference pack at the packing station help operators identify the two. If the package has a window, specify which pair faces outward and which part of the garment must be visible. Approve the presentation with the actual waistband artwork so a change in folding does not unexpectedly hide the size tab or logo.
Check fabric consistency across the pack
A solid and a print can share a listed composition and still feel different on the body. Review the finished fabric after its intended print and wash processes. Check surface hand, opacity, stretch and recovery in the direction in which the garment is worn. Compare panels where the print coverage is heavier with unprinted areas and look at folded seams in the finished sample. A swatch may feel soft on a table while a bulky seam feels noticeably firm under trousers.
Cotton-rich stretch knits are one starting point for an everyday range. A regenerated-cellulose blend may offer a different handle or drape. A synthetic stretch knit may help a buyer develop a smoother surface or target a quick-drying product. Confirm any performance claim using evidence for the selected material. The composition alone cannot tell the buyer whether a finished pair has the intended recovery or whether the inside of a seam feels comfortable.
If the pack uses a light body color, review how the waistband, seam allowances and pouch lining appear behind it. Use a repeatable viewing setup for buyer and supplier review. Compare each materially different fabric quality after the agreed care cycle. A gray heather may use a different yarn setup from a solid, and a printed pair can have a distinct finish. When the buyer expects the same fit across the set, differences in stretch or shrinkage may require separate material or pattern approvals.
Approve waist, leg and pouch fit together
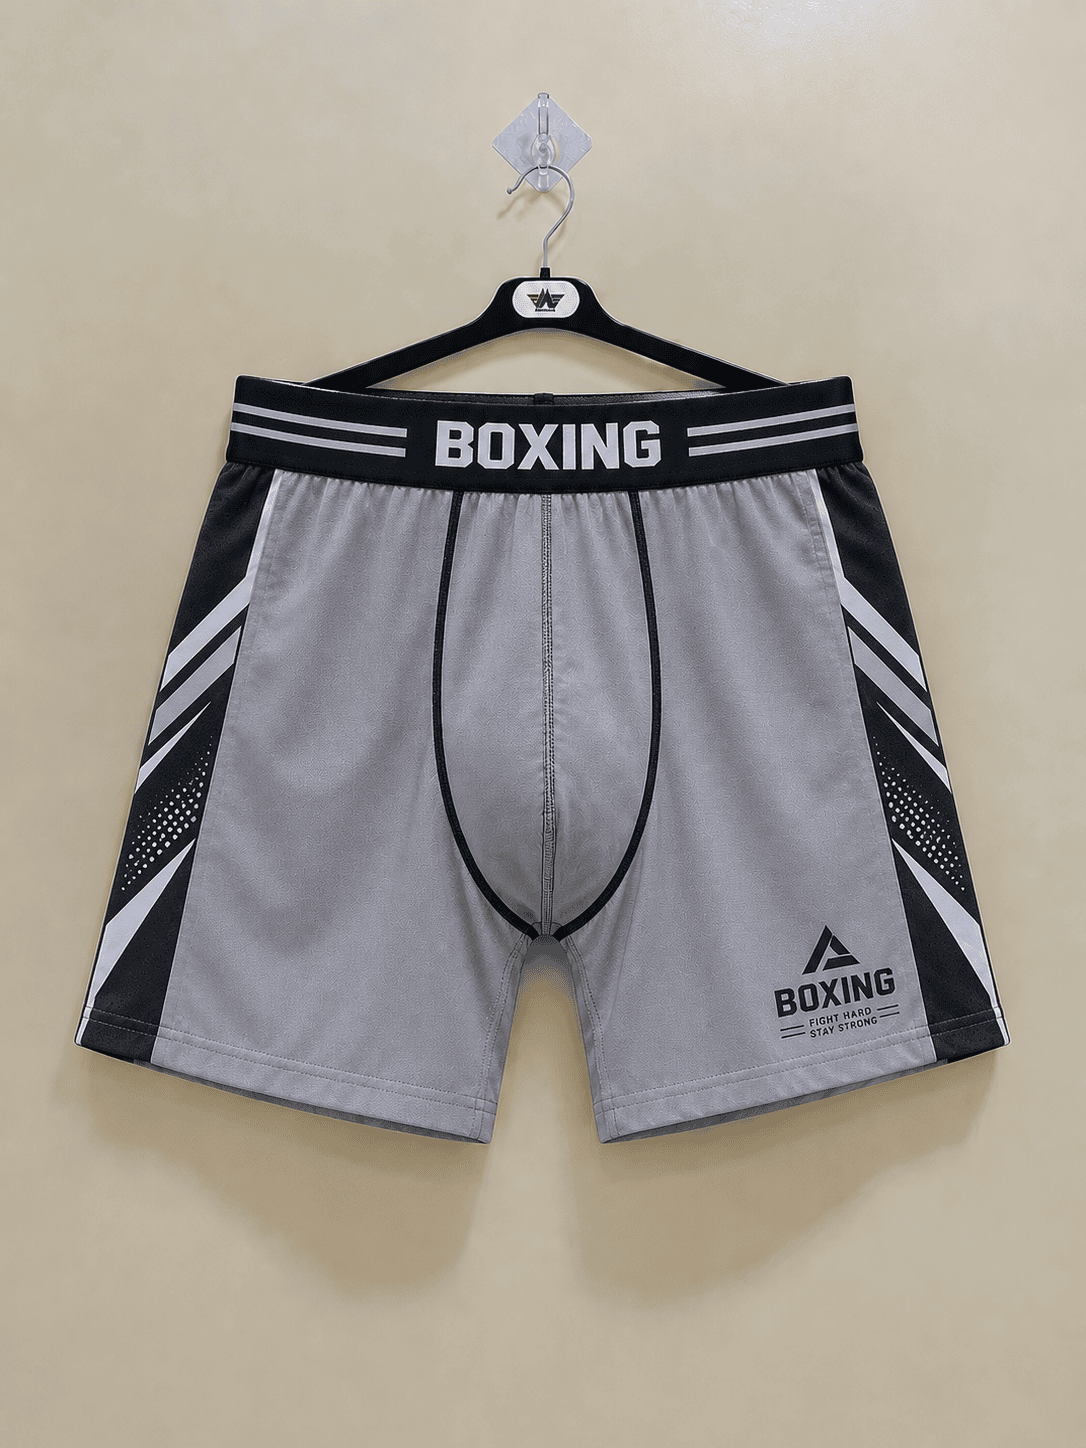
Assess the waistband on the finished garment. The elastic width sets part of the visual appearance, but the band also needs to stretch and recover with the fabric it is attached to. Review the waistband at rest, while seated and after the wearer stands again. Note whether the band rolls, twists or presses at the join. For a woven logo elastic, check logo orientation and placement on representative sizes, since the length of the repeating artwork affects where the band can be cut.
Define the relaxed waist measurement and the method for checking extension. Two inspectors can record different numbers if one pulls the garment harder. Document the intended setup, use the same method at each sample review and identify the garment landmarks on a drawing. The internal specification should also show front rise, back rise, inseam, leg opening and the locations that govern pouch shape. State whether the waistband is included where it affects rise measurements.
Check leg opening and inseam together during wear. A short inseam can position the hem on a wider part of the thigh, which changes how a nominal opening feels. Observe what happens after walking, sitting and standing in the intended trousers. If a hem repeatedly rides up, compare the opening, leg shape, fabric recovery and seam placement before choosing a change. Record the movement that produces the problem so the next sample can be checked the same way.
Related resource: custom boxer briefs fit guide.
Make the size label and retail chart agree
Decide what the shopper should compare when choosing a size. A body waist range describes the wearer the garment is intended to fit. A relaxed waistband measurement describes the article on a flat surface before extension. Make the difference explicit in the retail chart. If a buyer uses the same size labels for styles with different inseams, include the fit description or garment length so the shopper knows what changes from one range to another.
Fit a representative small and large size as well as the base sample. Check the rise, seat and leg proportions on the approved fit models. Repeat the measurements across every materially different component that shares the same size label. The buyer may approve different construction details for a solid and a print if the experience remains consistent. Keep the revised spec linked to the relevant component code.
At the packing table, the operator needs an accessible size identifier on each pair. A transfer label printed inside may become invisible after folding, so test the size check in the actual assembly sequence. Document which visual cue the packer needs to see and check the outer barcode against the retail SKU. If the body label and the package disagree, separate the stock and trace the affected components before releasing any packs.
Related resource: apparel tech pack guide.
Compare three pack formats before choosing artwork
A paper band around folded garments offers direct visibility and can be suitable when the merchandise will sit on an orderly shelf. Check how the band behaves after the pack is handled several times. If the fold compresses or the band slides, the package may lose its shape before the garments reach the shopper. Evaluate the securing method with the actual fabric. A slippery synthetic knit may behave differently in the same band from a cotton-rich fabric. Ask the supplier to show how operators will set the band position consistently.
A carton provides a printable surface for size information, product details and artwork. A window can show color or branding but makes the fold and orientation more important. If the window exposes one color only, make sure the rest of the mix is described clearly on the carton. With a closed carton, compare rendered artwork with a physical proof in the intended light. Check that text contrast and barcode placement still work near creases, folds or glued areas. Open and close a trial carton to see whether customers and staff can access it without tearing the panel that carries product information.
A hanging pack needs a stable presentation under its own weight. Place it on the intended display hook, then check how far it projects, whether labels remain visible and whether the garments shift to one side. If the hook is integrated into a carton or carrier, inspect it after ordinary handling. A package specification should describe both the materials and the orientation in which the product will be presented. An approved flat proof cannot show all of the stresses the assembled design will see on display.
Compare the formats using a physical sample for the smallest and largest planned sizes. A carton that holds size medium neatly can compress a larger garment or leave smaller garments loose. If two carton sizes are needed, give them distinct component codes and define which garments each accepts. Check shipper dimensions using fully packed retail units. A small change in the retail package depth can affect the number of packs that fit in a carton and the cost of moving the order.
| Format | Display advantage | Trial check |
|---|---|---|
| Paper band | Shows folded garments | Check slippage after handling. |
| Window carton | Shows a selected garment | Check color and fold alignment. |
| Hanging pack | Displays on a hook | Check stability and label visibility. |
Schedule approvals before committing to printed packaging
Map the decisions that depend on information from another team. The designer can approve color and visual placement before exact production quantities are set. The packaging team still needs final size labels, pack names, codes and care information from the buyer. The supplier should know which items can start early and which must wait for written approval. If packaging is printed before the assortment is fixed, a color change may require a new artwork run as well as a garment change.
Use a proofing sequence with one current file and a named owner for each revision. Compare the artwork proof with the actual pack matrix. Confirm that the garments shown match the order of colors and that the text uses the same descriptors as the listing. Where a print color looks similar to a solid through the package window, review the assembled unit as well. The final proof should be easy to identify later from its revision date or approval code.
Review differences by market before grouping orders. A retailer may require a different product name, size presentation, language or barcode for its own market even when the garments are made from the same materials. Define those variants clearly at quotation and confirm any market-specific labeling requirements with the party responsible for the product. A single garment stock may be useful across markets if the labeling and pack assignments are controlled. Receiving teams still need to distinguish which finished retail units were made for each destination.
Keep a physical approved pack when the format depends on visible folds or the order of the garments. Photograph the front, back, side and contents. A photo of the opened pack should show the full mix and size marks without relying on an operator to infer what is behind the first visible pair. Record where the sample is held and which version it represents. Give the product team access to the same reference used on the line.
Diagnose wash and wear changes by component
Make a pre-wash record before comparing care results. Photograph the waistband, side seam, leg edge and pouch shape. Record the size, color, fabric and trim reference of each pair. Use the same measurement method after drying and resting the test samples under the agreed conditions. If a pair appears shorter, determine whether the inseam changed, the leg opening contracted or the fabric rotated on the garment. Each finding points to a different question for development.
Review the whole set side by side after care. A navy pair and a printed pair could both meet a length tolerance while looking more different than the buyer expected. A waistband can also lose recovery without a large change to a nominal garment point. Compare behavior during normal dressing and sitting. If there is a difference, review the elastic, fabric and the stitching that joins them before revising the fit table. Where elastic colors come from separate lots, retain a reference from each relevant lot.
Use an agreed plan when a buyer requests evidence of color transfer or other performance. The approach should specify which materials or colors are included and who reviews the results. A dark solid packed next to a pale printed pair may merit its own evaluation when the buyer’s requirements call for it. Keep laboratory reports and the approved samples under the same component references. If a later fabric or print substitution affects the tested construction, review what evidence needs to be repeated.
Review the care information on the finished product after these decisions have been made. A common instruction for the whole set needs to suit every included garment. If different styling or materials require different treatment, decide how the packaging and attached labels will communicate that to the shopper. Give the supplier and retailer the same approved wording. That avoids a situation in which a package gives one instruction and the garment itself gives another.
Related resource: garment shrinkage test guide.
Work through a sample order
Suppose a retailer wants 600 medium packs with one black, one navy and one gray pair in each. After garment inspection, there are 620 usable black pairs, 585 navy pairs and 610 gray pairs. Even with more than 1,800 usable garments in total, the factory can assemble only 585 complete packs. To meet the original commitment with the approved mix, it needs 15 more approved navy pairs. Planning based on the total garment count would hide that shortage.
Apply the same calculation independently to each size. Extra medium navy pairs cannot fill a shortage in large navy. If the black component goes into two bundles, allocate approved stock to each bundle before packing. Make the allocation visible on the order sheet and update it when an inspection removes components. The person releasing an order should be able to reproduce the calculation from the usable quantities on hand.
Ask for both a per-garment quote and a per-pack quote where they help explain the cost. Confirm whether the latter includes the package, barcode labels, assembly, carton packing and any requested testing or sample work. Compare quotes for the same assortment and revision. A low garment price might accompany a higher packing charge or a minimum on a printed box. Use an approved pack image and item list when confirming what the quote actually includes.
| Component | Pairs per pack | Usable pairs | Complete packs supported |
|---|---|---|---|
| Black | 1 | 620 | 620 |
| Navy | 1 | 585 | 585 |
| Gray | 1 | 610 | 610 |
Manage shortages and keep production lots traceable
Agree what should happen when a pack is incomplete. List who can approve a replacement, whether the retailer accepts a short shipment and what records must be updated if the plan changes. A fixed pack may require an additional sewing run or a smaller shipment of complete units. An approved substitution may require different artwork or a different code. Make the allowed actions clear before the line is under pressure to close cartons.
Keep separate counts for received, usable, allocated and packed garments. Received units include material that may still be awaiting inspection. Usable units are the pairs the team can place into packs. Allocated units are reserved for a particular pack code or order, while packed units have already entered finished stock. Reconcile the counts by size and color. The distinction matters when two packing lines use the same black pair and one line needs to complete a retailer’s shipment first.
When a component changes lot, record which completed packs contain the new material. If the buyer or retailer reports an issue, this record helps determine the affected range. The relevant trace can be as simple as a packing record with the date, line, component lot and carton range. Design the record with the people who will fill it in. The line needs a manageable way to record a switch without disrupting routine work or relying on memory at the end of a shift.
Set aside examples from the first run and any approved change. The buyer may need a complete pack to investigate a return or confirm a replenishment sample. A retained loose garment can answer fit questions. A retained complete pack can also show carton printing, folding and assortment at the time of manufacture. Specify which items need to be kept, how they are identified and who can request them for review.
Prepare a request for quotation suppliers can answer
Begin with the products you need quoted. List each garment component by size, color and fabric, then provide the complete pack quantities. Provide separate lines for retail packaging and transport cartons. If you are still deciding between two pack formats, request independent quotations on the same garment specification and record the differences. That helps you see whether the price reflects a change to the underwear, the packaging or assembly.
Include a drawing or photo that shows what needs to match the reference. Mark the fit, seam construction, trim and appearance requirements that affect approval. If a construction detail is open, ask the supplier to show what it priced. The buyer may have a preferred waistband style without having selected the exact elastic. A quote can state which width, artwork type and finish are included, then let the buyer compare the effect of a different option. The final purchase specification should reflect the approved materials before the order is placed.
Ask which approvals affect the production schedule. Consider fabric and trim procurement, fit samples, size-set review, care checks, packaging artwork and the packing trial. Confirm where a revision would move the expected schedule. A change to an outer label can have a shorter path than a change to a body fabric, while a custom printed package can have its own production window. Record the dependencies in the same place as the order dates so the buyer knows which decision needs attention first.
Finish the request with acceptance criteria and ownership. State who approves fit, shades, labeling and retail presentation. Ask the supplier to flag any quantities or materials that differ from the requested brief. Keep an approved version of the quotation and compare it with the purchase order and packing matrix. This creates an order record the brand can reuse when opening a new color or repeating a core assortment.
Related resource: wholesale quote comparison guide.
Test the assembled pack before bulk release
Get a pack made on the intended line or with the same materials and folding method the supplier plans to use. Place it on a shelf or hold it as a customer would. Check that the size, pack count and color description can be read and that the correct pair is visible. Open the package and review the order and orientation of the components. For a hanger pack, check that folding and fastening keep the garment in the intended position during ordinary handling.
Verify the actual printed barcode against the stock record with the scanning setup used for receiving where possible. Confirm that outer cartons and inner retail packs use the identifiers the buyer expects. If a carton is allowed to contain assorted sizes, specify the breakdown. If it must contain a single size, check that rule on the first cartons. Keep an approved copy of the retail artwork and carton markings beside the pack specification.
Define what the inspector should open and check under the buyer’s inspection plan. Relevant checks include count, color mix, size alignment, visible workmanship, barcode, folds and the pack condition. For a recurring fault, record whether it originates in garment labeling, component allocation, packaging artwork or assembly. The corrective action should address that point in the process so the same fault does not continue through the next production lot.
Related resource: garment sampling guide.
Hand off the first packed cartons to the receiving team
Before the bulk shipment leaves, send the receiving team a sample carton record with the retail pack code, the units per carton and the expected size and color assortment. Include a photograph of the unopened carton and a second photograph showing the way the packs are arranged. A receiving team that sees only a purchase order may have no way to tell whether a specific fold, orientation or assortment is intentional. A clear reference also helps when multiple deliveries arrive with similar packaging.
At the first receipt, compare three levels of information. The purchase order describes what was ordered, the carton identifies what was shipped and the retail pack shows what the customer will buy. If the numbers disagree, start with the level at which the mismatch first appears. A carton labeled with the wrong pack count requires a different correction from a correct carton containing a retail pack with one pair missing. Keep affected stock identifiable while the team checks whether the issue is isolated.
For an online launch, compare the first received pack with the product listing before orders go out. Check the images, size chart, pack count and color order. Take one example from each assortment and review how the selection appears in the storefront and on the shipping label. A solid that the production team calls charcoal may have a different retail name. Make sure both names connect to the same approved component to avoid a false mismatch during stock checks.
Record the final delivery in terms of complete packs and leftover garment components. If leftovers were shipped separately or held for a repeat run, identify where they are stored and which approved mix they can complete. Inspect the material and shade before using leftovers alongside a later lot. This keeps a packing adjustment from becoming an unrecorded change to the product. A short delivery review should leave enough detail for a new buyer to place the next order using the same records.
Prepare the repeat order
Keep the approved garments, shade references, elastic artwork and packaging revision together. If the next run substitutes a material or uses a different print house, review the affected components against the same fit and care criteria. A minor color change can be acceptable only if it matches the agreed product listing and pack specification. Document approval before mixing new and existing stock.
Track returns by pack code, size and reason. A comment that one pair fits differently can lead to a comparison between components that otherwise look identical on the order sheet. Check whether it came from a particular fabric treatment, elastic lot or mislabeled garment. Review the evidence with the supplier before revising the entire size chart. Replenishment gives the buyer a chance to correct a specific issue while keeping the approved parts of the product consistent.
Send a pack matrix, core fit requirements, proposed fabrics and order quantities when requesting a quote. Identify the garment and package samples the buyer needs to approve, and agree who makes each decision. A clear handover links the shopper’s experience to the factory records needed to produce the same set again.
Related resource: M&A Composite contact page.
Frequently asked questions
How many pairs should a boxer briefs multipack contain?
Choose the count based on the customer, price point and sales channel. Test the completed pack with actual garments across the planned size range.
Can boxer briefs in one pack use different fabrics?
Yes, if the assortment describes them accurately and each pair meets the agreed fit and care requirements. Check each distinct material in a finished garment.
How do buyers calculate the number of complete packs?
Divide the usable quantity of each component by the number required per pack, rounding down. The lowest result determines the maximum number of complete packs for that size and assortment.
What should a factory check before sealing a multipack?
Check the count, colors, size labels, fold sequence, barcode and condition against the approved packing matrix and reference sample.
What happens when one color runs short?
Recount by size and component, then follow the agreed rules for completing the order. Obtain buyer approval for any change to the advertised assortment.