Published by M&A Composite Ltd • 18 October 2026
Custom bras: connect cup construction, band fit, straps and component approvals before planning bulk production.
Practical development guidance for private label brands. Product photographs illustrate visible styling; they are not test or certification evidence.
Table of contents
Custom bras: turn a collection idea into an approvable specification
Custom bras development begins with a deceptively simple question: what exactly is the brand trying to approve? A colour photograph can communicate an attractive neckline or lace placement, but it cannot describe the entire garment. Cup geometry, band behaviour, strap arrangement, internal layers and closure details need to work together. For a private label collection, those relationships deserve attention before the discussion centres on unit price or packaging design.
This guide explains how to prepare and review a conventional bra development project, from the first design brief to the reference sample used for production. It is commercial and technical planning guidance, not a consumer fitting diagnosis or a promise of medical benefits. Specialist products, including medical garments and bras marketed for particular sports performance, need their own development requirements and suitable evidence beyond the scope of this article.
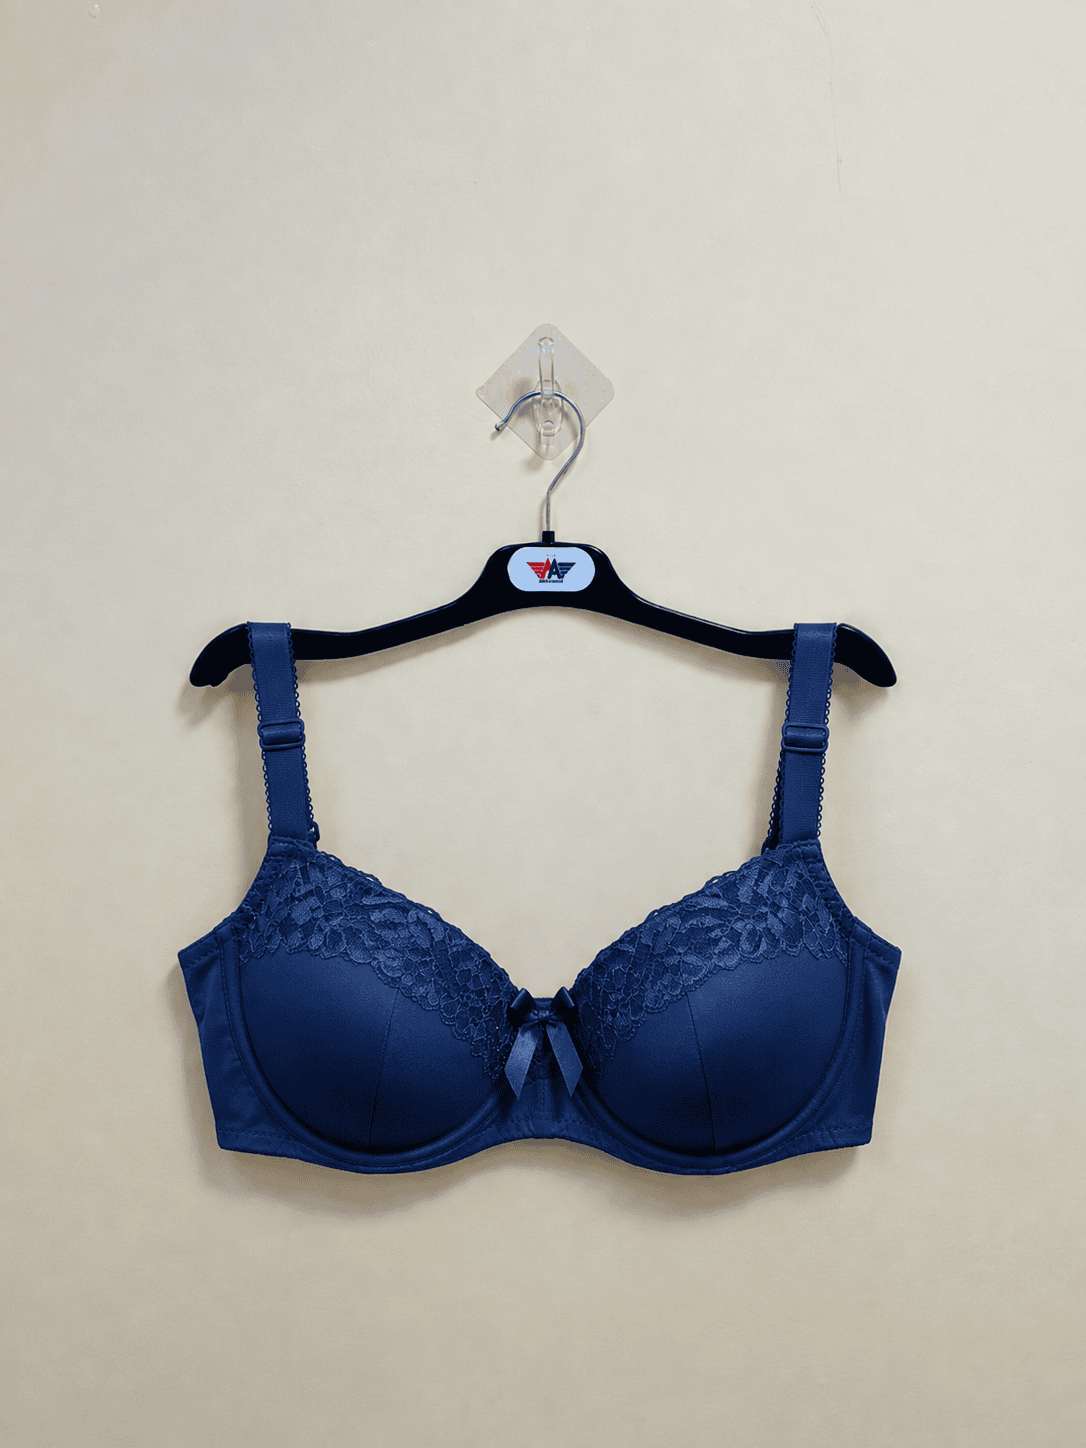
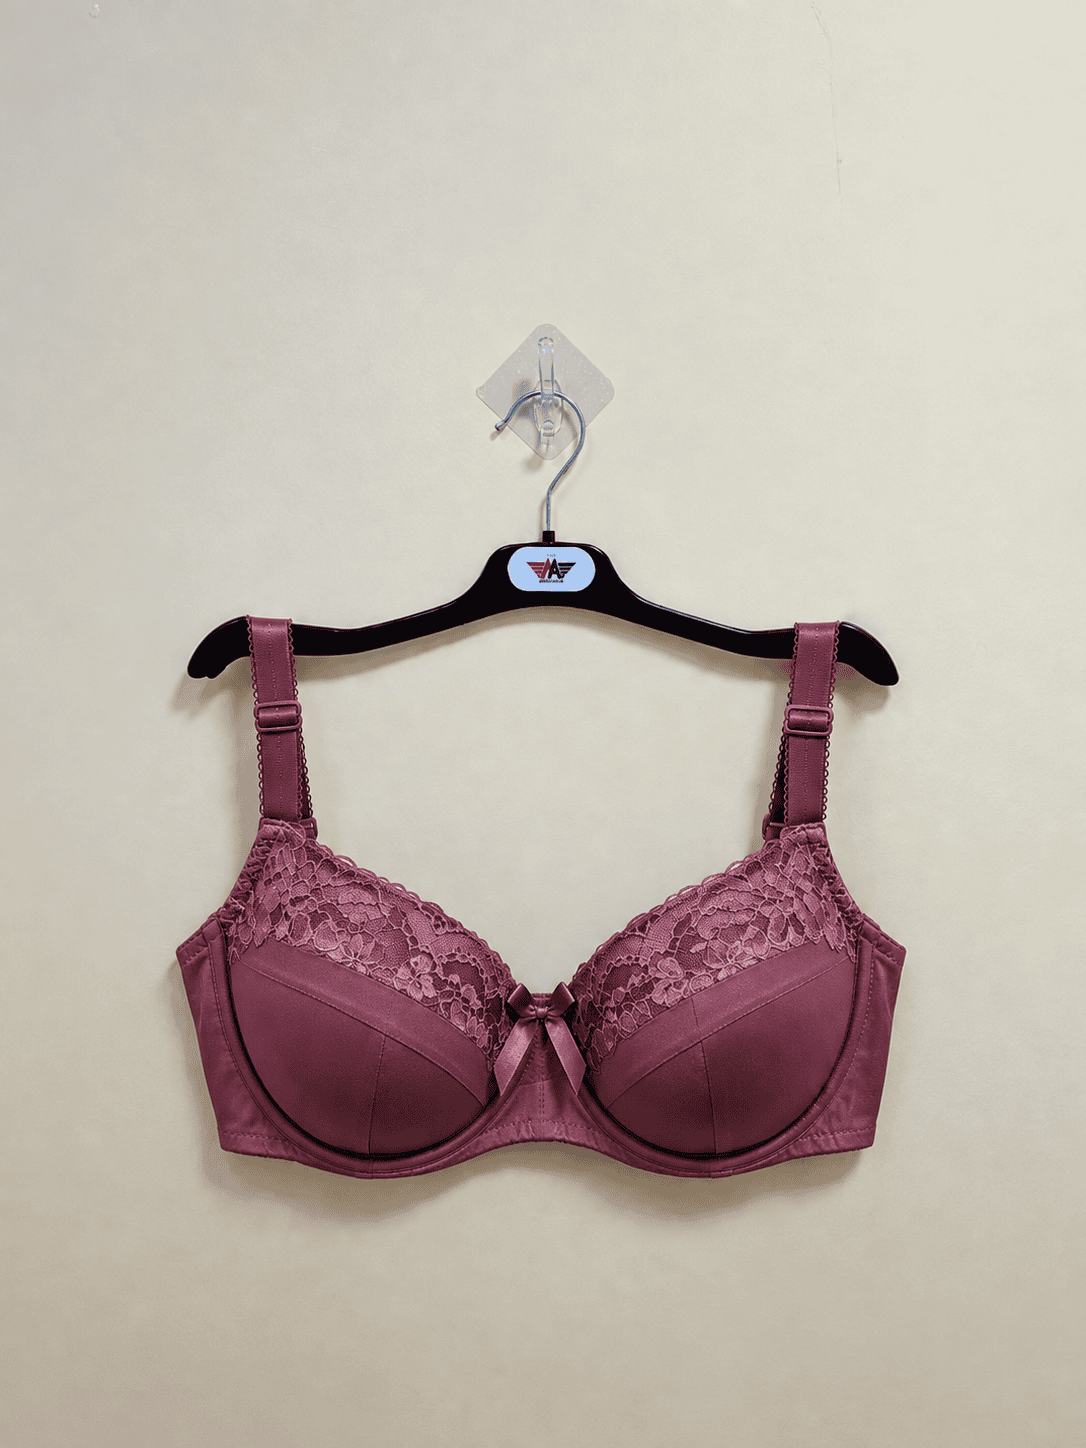
The product photographs are drawn from the M&A Composite Ltd media collection and link to the relevant Bra manufacturing page. They show visible styling references. A photograph does not establish fabric composition, internal padding, test results, current availability or certified status. Discuss those points against actual samples and documents rather than assuming that every feature can be identified from the front view.
Use the following twelve development decisions to organise a supplier conversation. The aim is to bring design, sourcing, fitting and commercial information into one consistent record. M&A Composite Ltd order quantities, materials, services, lead times and prices must be confirmed for the specific project. A documented approval trail gives both sides a clearer basis for deciding whether a proposed collection is ready to move forward.
1. Define the bra category and the design boundaries
Start with a description of the intended product category and customer. An everyday structured bra, a soft bralette and a garment designed for a particular activity are different development briefs. A shared colour or similar neckline does not make their patterns and components interchangeable. State the intended wearing context, desired coverage, size range and visual direction before requesting a construction recommendation or a quotation.
Provide front, back and inside sketches. Show the neckline, cup panel lines, centre front, side section and fastening arrangement. Mark whether a feature is essential or open to technical discussion. If a reference garment has a decorative bow that you do not want, note the omission explicitly. Otherwise a supplier may reasonably treat the photograph as an instruction to reproduce that visible detail.
Describe the desired silhouette without turning it into an unsupported performance claim. Words such as shaping or supportive may need further explanation about the intended appearance and evaluation process. Ask the technical team what construction could achieve the approved design direction and how it should be assessed. Avoid promising a universal wearing experience across all body shapes from a single attractive sample.
The first deliverable should be a short product brief carrying a style code, revision date and owner. Attach the authorised design references and identify unresolved questions. This makes it possible to distinguish a proposed idea from a confirmed requirement. When the supplier suggests a change, record whether it affects appearance, fit, material availability or price so the brand can evaluate the actual tradeoff.
2. Choose cup construction before finalising the outer fabric
Identify whether the proposed cup is assembled from cut panels, uses a formed component or follows another agreed construction route. Then document the layers required for that route. Outer fabric, lining, stabilising layers and any padding are separate decisions. A smooth external surface in an image does not prove which components are inside, and a supplier should not need to guess what the brand intends.
For a panelled cup, show the seam arrangement and which direction each material should face. If a formed component is proposed, request a clearly identified physical reference and confirm its compatibility with the selected size range. The purpose is to establish a repeatable shape and assembly instruction. Do not treat a generic description such as standard cup as sufficient identification for repeat orders.
Review the left and right cups together and inspect the inside. Check the intended seam appearance, layer alignment and relationship to the neckline. Where a material is substituted during early sampling, note that substitution on the sample card. Its fit and appearance may help guide development, but it cannot automatically approve a final construction using a different internal component.
Ask the supplier to explain which changes require a new cup development review. An apparently small outer fabric change can affect the way a layered construction behaves. Keep an approved component sample alongside the complete garment and technical sheet. This lets a later reviewer identify what was actually accepted instead of relying on an old photograph whose internal details remain invisible.
3. Specify the band and wing materials as functional components
The back and side sections, often called wings, should be specified as carefully as the cups. Record the proposed material reference, composition, construction, weight where relevant and stretch direction. State whether the section uses one layer or multiple layers. A soft hand feel is useful feedback, but it does not identify a material or establish how the completed band will behave when worn.
Define the relaxed band measurement and any additional assessment required by the technical team. Explain the fastening position used when measuring a closed garment. If one sample is measured on the loosest setting and another on a different setting, the numbers may be compared incorrectly. Include a diagram that connects the measurement points to the closure reference rather than assuming everyone follows the same convention.
Assess the band together with the elastic application and closure. A material swatch stretched by hand cannot reveal every interaction in the finished bra. Record whether the band sits as intended during the agreed fitting review and whether edges distort or turn. Describe the observed location and behaviour before deciding whether the correction belongs in the pattern, component choice or sewing process.
If the wing material changes after fitting, reopen the affected review rather than carrying the previous approval forward without comment. The updated sample should use the proposed production construction as closely as possible. A dependable specification ties the band material, pattern version, elastic reference and garment measurement chart together, so each approved element can be traced to the same development decision.
4. Agree centre front, side coverage and neckline position
The centre front and side sections define important visual relationships between the cups and the body of the garment. Show their intended height and width on the drawing and identify how the measurements are taken. A general instruction to increase coverage can produce several different pattern responses. Specify which edge or area should change and which aspects of the original design must stay consistent.
Review the neckline from both the front and an appropriate side view. The fitting team should record whether the edge follows the intended line for the chosen product and wearer group. Feedback such as upper cup edge stands away on the reviewed sample is more useful than a broad judgement that the whole garment looks wrong. Avoid drawing universal conclusions from one wearer or one size.
Where the design uses a wire or another structured component, its relationship to the surrounding pattern needs specialist technical review. Confirm the exact component and the construction used to contain it. This article does not offer a universal wire shape, size or fit rule. The relevant pattern and component decisions should be made and checked by personnel experienced with the proposed bra construction.
Record changes as a coordinated pattern revision. Lowering the centre front, changing a cup seam or narrowing a side section may affect neighbouring areas. Ask what needs to be rechecked after the change and close those points in the next sample review. The approved result should be a complete garment with balanced details, rather than a list of isolated corrections that have never been assessed together.
5. Develop straps, adjusters and attachment points together
Specify strap width, material reference, colour and arrangement. Show whether straps are fixed or adjustable and identify the adjuster and ring components if used. Back attachment position and front attachment position should be dimensioned on the drawing. Two garments can use the same strap elastic yet produce a different visual and wearing result because their attachment points and adjustment range differ.
Check that the strap passes through the nominated hardware as intended. Width alone is not enough to prove compatibility; the actual component combination needs physical review. Inspect for twisting, rough edges and unwanted movement during the agreed evaluation. A product photograph can show an adjuster, but it cannot establish its durability or the performance of an alternative part sourced for a new order.
Record the finished strap length and the condition in which it is measured. For an adjustable construction, state the reference setting used for the measurement and separately confirm the required adjustment range. This reduces confusion when a reviewer compares samples adjusted differently. Keep the strap measurement instruction in the technical pack alongside the hardware identification and attachment construction detail.
Review the attachment seams from the inside as well as the outside. The finished area should match the approved construction and should not contain obvious loose ends or distorted material. If moving an attachment is proposed to resolve a fit concern, recheck the neckline and back arrangement. Do not treat the strap as an independent accessory when its position forms part of the overall pattern balance.
6. Lock closure details and the complete component list
A closure specification should identify its type, width, rows or settings where applicable, colour and orientation. State how it is attached to each side of the band. A photograph of the closed back is useful, but include an open view and a component reference as well. These details help avoid a later substitution that appears similar while changing the finished dimensions or attachment method.
Build a bill of materials that lists every agreed component. Alongside outer fabric and lining, include elastics, straps, closures, hardware, thread, decorative items and labels. Assign references that the supplier can match to actual items. A trim card with physical examples is particularly helpful when several components share a similar colour but differ in texture, finish or technical characteristics.
Inspect the surfaces and edges of hardware and closures using the agreed quality plan. Where testing is required, ask the responsible technical team or laboratory to define suitable methods and criteria. Do not assume that a metal or coated component is suitable for all intended uses because it looks attractive. Likewise, do not add broad safety or durability claims without the evidence needed for the specific product.
When an item becomes unavailable, record the proposed replacement and identify what needs renewed approval. The change may affect appearance, fit, evaluation evidence or commercial terms. A controlled component list makes that discussion visible before bulk assembly. It also helps repeat orders use the approved configuration instead of gradually accumulating unrecorded substitutions across several small purchasing decisions.
7. Review lace, colour and material compatibility
For a lace detail, specify the reference, width, motif direction and intended placement. Show whether the left and right sides should mirror each other or follow another visual rule. The border can be part of the neckline design, so it should not be treated as a decorative extra added after pattern approval. Confirm how the lace is cut and joined at the relevant edges.
Approve colours across the complete component set rather than viewing each item separately. A cup fabric, strap and closure may all be described as navy while looking different together under agreed viewing conditions. Use identified colour standards and component submissions. Record which differences are acceptable and which need correction, particularly where the design relies on an intentional tonal match or contrast.
Assess the proposed materials in combination. Layer alignment, stretch direction and edge finishing can influence the appearance of a small garment. An attractive swatch does not establish how a lace section will lie when joined to the selected cup and neckline construction. Ask for a sample showing the final arrangement and inspect the inside where decorative materials meet lining or elastic.
Keep permissions and claims separate from visual approval. A supplied motif or branded accessory may require authorisation even if it is easy to reproduce technically. Material descriptions also need supporting records. If the brand plans to call a fabric recycled, organic or certified, request the relevant evidence and confirm its scope before placing the claim in a product description, care label or retail packaging.
8. Make seam and edge finishing instructions visible
Map the seams and edges on the technical drawing. Identify the cup joins, side connections, strap attachments and elasticated openings, then specify the intended finishing method for each. Include photographs of approved internal construction when possible. A bra can present a clean front view while the internal assembly differs substantially from the reference the brand thought it had approved.
The technical team should select thread, needles and machine settings suitable for the actual materials and seam functions. Ask how the settings will be established and checked during preparation. A universal stitch instruction copied from another garment may be inappropriate for a delicate lace edge or a layered cup seam. Development should demonstrate the chosen construction rather than rely on a general quality adjective.
As educational background, CottonWorks garment construction resources discuss the roles of seams, stitches and garment components. Use that distinction when writing the specification: identify the material, the joining method and the required finished appearance separately. The source does not verify the construction or quality of any M&A sample or future order.
During sample review, record skipped stitches, loose ends, seam distortion and uneven elastic application by exact location. Add a close photograph and explain the expected correction. If a construction change affects the shape or extension of an edge, check the relevant fit points again. A visually neater seam is useful, but it should be accepted as part of the garment rather than as an isolated photograph.
9. Plan fitting reviews without confusing labels and fit
Choose a size naming system and explain the target customer before interpreting the labels. Different brands can use similar size names for different specifications. The garment chart and fit block should therefore carry the actual intended dimensions and construction references. If an existing block is supplied, confirm that the brand has the right to use it and that it suits the new product direction.
Set up a fitting review with an appropriate technical specialist and consenting adult participants. Explain the purpose and handle images and personal information with care. The ordinary production comment sheet generally needs garment observations and sample references, not unnecessary identifying details. A development team should be able to track a pattern issue without circulating sensitive photographs through unrelated commercial conversations.
Record the reviewed size, fastening setting, strap adjustment and sample revision. Then describe the observed relationship between cups, band, neckline, straps and side sections. Use language that points to a garment feature and a location. Do not diagnose health issues or promise that a pattern change will solve a medical concern. This guide concerns product development and quality records, not clinical advice.
Close the review with a clear decision: approved, approved subject to identified conditions, or revise and resubmit. Name the person responsible and specify the evidence required next. Where a sample uses substitute fabric or components, describe how that limits the approval. A fitting comment cannot automatically approve unseen production materials that may change the garment’s behaviour.
10. Validate the size matrix and grading approach
List every intended size combination before the quotation and sampling plan are finalised. A bra range can involve relationships between band and cup dimensions that need more than a simple small, medium and large progression. The technical team should define the grading approach for the proposed construction. Do not assume that scaling the entire garment by one percentage will preserve the intended fit or appearance.
Request a size set plan that reflects the collection’s actual risks. Identify which sizes and component combinations will be physically reviewed. Extremes of the range and transitions between component sizes may deserve particular attention. If only part of the range is ready during an early submission, state that limitation explicitly. An approved middle size is evidence about that sample, not proof that every other combination is ready.
Check the trims and artwork across the size matrix. Strap width, closure dimensions, lace placement and label position may need separate rules. A decorative detail that sits neatly in one size may collide with a seam in another. Record which components remain constant and which vary, then verify that the bill of materials and measurement chart communicate the same decisions.
When adding sizes later, treat the extension as controlled development. Ask whether patterns, components and evaluation evidence need updating. Keep the approved size set references accessible for repeat orders and inspect the new submissions against the current records. This helps the brand expand a range without letting the original fit concept drift through unreviewed assumptions.
11. Agree washing, component and claim evidence
Define the proposed care route and discuss the evaluation plan with the responsible technical team. Record which material and component references are included in each sample. Assessing a loose fabric swatch can support material selection, but it does not capture every interaction in a complete bra. The assembled garment can reveal changes in layer alignment, edge appearance, hardware and shape that are absent from a swatch.
Agree the methods, conditions and acceptance criteria before arranging formal evaluation. After the agreed process, compare the sample with its original measurements and appearance records. Describe actual observations, including where distortion or colour change occurs. Do not describe a product as tested or passed without identifying what was evaluated and whether the evidence corresponds to the current construction and selected colours.
For chemical testing and certification background, consult the official OEKO-TEX STANDARD 100 information. It describes a framework for textiles tested for harmful substances. If required for your project, request current documents and verify their relevant scope. This reference is not a claim that M&A Composite Ltd, the pictured garments or a proposed order has that certification.
Keep performance and environmental marketing claims tied to suitable evidence. General expressions such as sustainable, long lasting or high support can conceal very different meanings. Define the intended claim, ask what evidence is needed and review the wording before approval. A development article or attractive product image should not become a substitute for the reports and documentation relevant to the actual item offered for sale.
12. Prepare comparable enquiries and commercial approvals
Provide the same design revision, size matrix, material preferences and packaging requirements when comparing quotations. Explain whether quantities are provisional forecasts or intended orders. A proposal based on stock trims and a limited range cannot be compared directly with one including new component development and a broader assortment. Record the assumptions so a lower price does not hide a materially different product.
Ask how minimum quantities apply to fabric, colours, closures, lace and customised components. Sewing quantities and component purchasing commitments may differ. Confirm the actual terms for the project instead of assuming a general minimum applies to every style. This article does not state a fixed M&A order quantity, price or production lead time, because those details require a defined specification and written agreement.
Separate development milestones from production and shipment planning. Identify the approvals that must happen before the next stage can begin. If a component changes or a fit submission needs another round, request an updated schedule with its dependencies. A calendar date is more useful when the team understands what decisions and material commitments are required to support it.
Conclude the enquiry with an exception list: unresolved materials, incomplete size reviews, missing documents and open artwork decisions. Ask the supplier to confirm the proposed manufacturing route and scope directly. Share the complete brief through M&A Composite Ltd’s contact page so the conversation can focus on the actual collection rather than a generic promise about every possible bra product.
A development matrix for private label bra decisions
Use the table below to connect each design decision with the evidence required for approval. It is a planning matrix, not a test report or a ranking of one construction over another. The correct option depends on the product brief, target customer and results from actual development. Component availability, specialist capability and commercial feasibility must be confirmed for the proposed project.
For example, a lace neckline introduces both an appearance decision and a cutting and attachment instruction. An adjustable strap introduces material, hardware, length and placement decisions. Treating these as complete systems helps prevent a situation where every individual item has been approved but no assembled sample represents the intended combination. The consolidated sample should bring those separate records together.
The navy and burgundy product examples in this article help illustrate visible colour and styling choices. Their captions deliberately describe what can be seen. They do not identify fibre blends or hidden cup layers. Every gallery image opens the related Bra product page, allowing a reader to connect the development discussion with the company’s displayed product category and request more specific information.
For a coordinated lingerie collection, maintain separate garment specifications even where materials or brand labels are shared. A bra and a brief need different fit records and construction instructions. The custom briefs development article provides a complementary checklist, while the apparel tech pack guide can help organise common documentation across the collection.
| Development decision | Record to prepare | Approval evidence |
|---|---|---|
| Cup construction | Layer and panel diagram | Complete sample and component reference |
| Band and wings | Material, direction and measurements | Fitting and agreed evaluation |
| Straps | Width, adjuster and placement | Physical component combination |
| Lace placement | Motif and edge instructions | Left and right appearance review |
| Size range | Size matrix and grading records | Agreed size set review |
| Branding and packing | Artwork and packing instructions | Label and packed sample approval |
Seven approval gates from concept to reference sample
The progress bars below illustrate a possible approval sequence. They are not connected to a live order and do not describe how far any M&A project has progressed. A technically complex style may require additional rounds or specialist reviews. Agree the actual plan, responsibilities and submission requirements with the supplier instead of treating this visual sequence as a guaranteed production timetable.
At the concept stage, identify the design boundaries and proposed construction. Material and component selection should then support meaningful sampling rather than leave every important item provisional. A development sample can reveal questions that drawings cannot answer, but the comments need to be recorded with the exact sample and revision. Keep rejected or superseded references clearly distinguished from the current approved direction.
Fit approval, size set review and evaluation evidence answer different questions. A visually satisfactory garment can still have an incomplete size review, while an acceptable report on a material does not establish the final garment’s fit. Make those distinctions visible in the approval log. When a change affects a closed stage, identify the affected evidence and arrange the necessary review again.
Before bulk release, consolidate the final construction, materials, artwork and packaging into an approved preproduction reference. Ask the responsible people to confirm that the sample and records describe the same item. The garment sampling checklist provides a broader framework for submissions and comments. A clear approval record is more useful than an informal message saying that the latest sample looks fine.
Illustrative approval stages — not live order tracking.
Inspection feedback, packing checks and repeat orders
An inspection plan should identify what will be checked, when it will be checked and who can make an acceptance decision. Include measurements, visual workmanship, component identification, size labels and packing accuracy as relevant to the order. The responsible teams should agree the inspection approach and criteria. There is no universal sample quantity or defect acceptance threshold supplied by this article for every bra collection.
The fictional feedback table below shows how a comment can lead to a traceable action. It does not report actual M&A defects or inspection findings. Useful records identify the garment revision, location, observable concern, required response and next review. Avoid vague instructions such as improve everything because they leave the supplier unable to demonstrate that a particular problem has been resolved.
Review retail presentation with an actual packed sample. Check that labels and barcodes correspond to the enclosed size and colour, and that the presentation follows the approved instructions. For shaped garments, discuss how packing and transport arrangements will protect the intended appearance. The appropriate method depends on the construction and logistics plan, so confirm it against the actual product rather than relying on a generic packaging photograph.
For repeat orders, compare the proposed components and patterns with the current approved references before production. Ask for written disclosure of substitutions and review the affected decisions. The company overview and product pages are useful starting points, but a repeat order still needs a current specification and confirmed scope. Custom bras benefit from the same disciplined records after launch as they do during initial development.
Fictional feedback examples: not actual inspection results.
| Fictional sample | Observation | Required response |
|---|---|---|
| BRA-DEV-01 | Left lace placement differs from drawing | Review cutting reference and submit correction |
| BRA-FIT-02 | Upper edge stands away on reviewed sample | Technical fit review and pattern response |
| BRA-TRIM-03 | Closure shade differs from approved reference | Resubmit nominated closure colour |
| BRA-PACK-04 | Size label does not match pack artwork | Correct identification and verify packed sample |
Frequently asked questions about custom bras
What should a custom bras enquiry include?
Include front, back and inside sketches, the intended customer, size matrix, material preferences, component details, quantities and packaging requirements. Identify which decisions are fixed and which need technical proposals. An organised brief makes quotation assumptions and development questions easier to compare.
Can a photograph specify the complete bra construction?
No. A photograph communicates visible styling, but it cannot reliably identify internal cup layers, fabric composition, component performance or certification. Request actual material references, internal construction details and a development sample before approving the complete garment.
Should cup construction be decided before sourcing fabric?
Establish a proposed construction route early and review the layers and components it needs. Outer fabric, lining and any shaped or padded component must work together. Confirm the final combination through sampling rather than selecting every material independently.
How should adjustable straps be specified?
Record strap material, width, hardware, attachment positions and the required adjustment range. State the reference setting used for garment measurements. Review the actual strap and adjuster combination on a sample, including the attachment seams and the inside finish.
Does an approved base size approve the full range?
No. A base size approval applies to the reviewed sample and its conditions. Agree a size set plan and assess the relevant sizes and component combinations. Record remaining limitations until the agreed grading and size review is complete.
Are these bras certified to OEKO-TEX STANDARD 100?
This article makes no certification claim for the pictured garments or a future order. If certification is required, request current documentation and verify the relevant scope. A link to the official standard is educational and does not certify a company or product.
What is the minimum order for private label bras?
Request confirmation against the actual style, colour, size range and nominated components. Component purchasing commitments and garment quantities can differ. No fixed M&A minimum quantity is stated here because the commercial scope needs project specific review.
What do the approval progress bars represent?
They illustrate seven possible development gates from concept to a consolidated preproduction reference. They do not track an order or promise a delivery schedule. Your project needs a separately agreed plan, responsible approvers and clear requirements for each submission.
Should changing a component trigger another review?
Identify which approvals depend on the changed component. A replacement can affect appearance, dimensions, fit or evaluation evidence. Record the substitution and obtain the affected approvals before treating it as equivalent to the original approved configuration.
How can I start a bra development discussion with M&A?
Use the linked Bra product page or contact page and share the current technical brief. Include proposed sizes, quantities, materials, branding and packaging. Ask for written confirmation of feasibility, development steps, manufacturing scope and commercial terms for the project.
Discuss your custom bras project
Prepare sketches, size requirements, component references and estimated quantities for a project specific discussion.